1. There are three ways to start the process of creating a new Place. Using the Address Search, directly from the map if you already have the location selected or by selecting the + sign from within your Places list. After selecting which option works best for you, Steps 2 – 5 will walk you through the remaining steps to complete the Place.
Helpful Tip: Under Map Options, switch the Map Type to Satellite to get a better view of the map when drawing zones.

Address Search
(a) Type out the desired address and select the correct one.

(b) Select Create a New Place here.

From the Map
(a) Using your mouse, right click on the map where you would like the Place to be.
(b) Select Create a Place here.

From the Places list
(a) Select the + sign. This will place a pushpin in the center of the map displayed so you can continue creating the new Place.

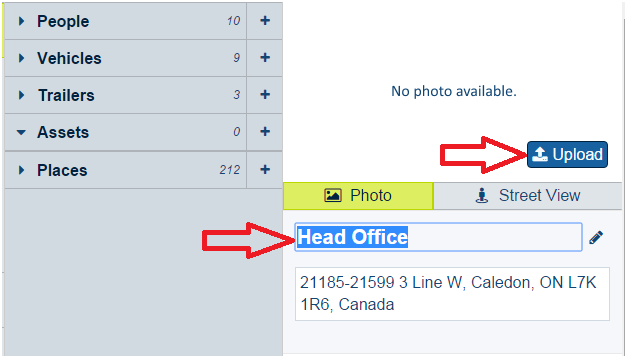
2. Add a name to easily identify the Place, XZY Office or Head Office for example.
3. Upload a picture of the Place.
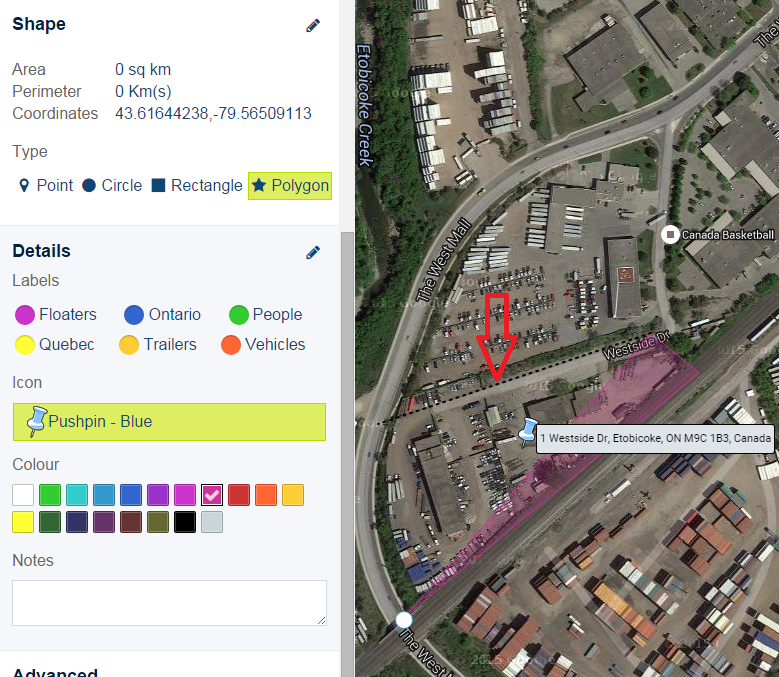
4. Select the desired shape of the Place – Point, Circle, Rectangle or Polygon.
(a) Point – A point or location on the map to identify an address.

(b) Circle – Drawn around the location or address.
To make the circle bigger or smaller, place your cursor over the dotted line, press the left mouse button and drag your mouse to expand or minimize the dotted line until the circle is the desired size.

(c) Rectangle – Drawn around the location or address.
To make the rectangle bigger or smaller, place your cursor over the circle at one of the rectangle points, press the left mouse button and drag your mouse to expand or minimize the rectangle until it is the desired size.
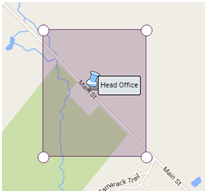
(d) Polygon – Drawn around the location or address.
Using your mouse, left click on the map where you want to start drawing the polygon. A hand icon/drawing tool will appear on the map. Using your mouse, drag/extend the dotted line, then left click at the next point to continue drawing the outline around the location or address. Continue to drag the dotted line and left click until the desired shape has been drawn.

When finished drawing the zone, select the starting circle to complete the zone.
5. Select Label(s), change Icon, choose zone colour and Save.

Note: If a label is not assigned to a Place, all Assets will interact with it.